Note: This only pertains to the N/A MKI MR2s
since the SCs alternator is located on the exhaust side
of the engine.
Removal
1) Disconnect battery by removing the negative
cable
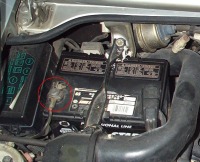
2) Remove the 2 hoses leading to the coolant
reservoir. Then remove the reservoir by pulling straight
up. May be a little tough if you haven't removed it in a
while, but keep yanking.
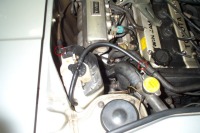
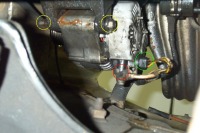
3) Now you can clearly see the alternator
(and my obvious water pump leak...) Remove the three 12mm
bolts. The 2 red ones are a little tough to reach. But removing
the adjuster bracket completely makes removal of the alternator
a lot easier later on. Also remove the oil dipstick as it
gets in the way.
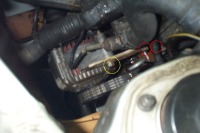
4) Now you should be able to pivot the alternator,
so that you can remove the belt. If not, you may have to
loosen the pivot nut underneath in step 5. Also, unplug
the circled sensor wire.
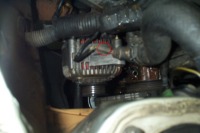
5) Now get under the car. Unplug the green
circled connector. It has a little tab you have to squeeze
and then pull out. Pull away the cover over the red circled
connector and then remove the 10mm nut that holds the wire
on. Now move to the pivot nut and bolt. It will probably
take both a 14mm socket and wrench to get them loose.
Once you got all that done, still from underneath
the car try wiggling the alternator back and forth pushing
it up, to remove it from the pivot bracket. Some alternators
may be in there pretty dang tight, so keep working it till
you get it out.
(mmmmm....look at all that tasty coolant)
6) Once it's free of the pivot bracket, remove
the alternator from the engine bay from up top. It may take
some finaggling around, but it comes out.
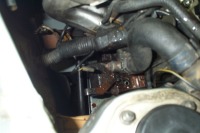
Here's just a view from the top with the alternator
out.
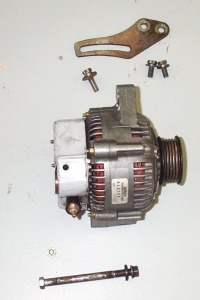
And here's the alternator parts removed.
Installation
It's basically just the opposite of the removal
process.
1) From above place the alternator into position
of the pivot bracket.
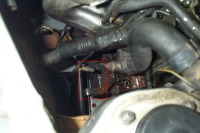
2) From below make sure the alternator is
lined up with the bracket, and pull it down into place.
Again this may be harder for some. My first replacement
alternator needed to be forced back in with a block of wood
and a hammer from the top. If it is this tight for you,
you may need another person using the hammer while you are
underneath lining up the pivot bolt and bracket. Do not
fully tighten up the bolt and nut once you get it in there.
3) Now back up top reinstall the adjustment
bracket. The 2 bolts that hold it to the engine first, but
don't tighten completely. Then line up the alternator with
the bracket and install the bolt, not tightening completely.
Now you can tighten the 2 adjustment bracket bolts down.
4) Go ahead and install the 3 different wires
and plugs that you removed. And replace the alternator belt.
Make sure of course everything is lined up properly with
the belt.
5) Tightening the belt. This is most likely
not the recommended way to do this, but hey it works. Don't
blame me if you break something though. Take a big screwdriver
or some other pry bar and pry the alternator in either of
the 2 spots, pushing the alternator back and tightening
the belt. Once you think it's tight enough tighten down
the adjustment bolt. Proper way is to test if the belt is
tight enough is a belt tensioner gauge. It may take another
person to hold the pry bar while you tighten the adjuster
bolt.
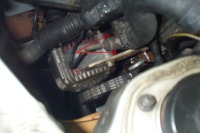
6) Once you are satisfied with this, tighten
the pivot bolt back underneath the car.
7) Replace the oil dip stick, and the negative
battery cable.
8) Start her up. If you notice any squeals
coming from the alternator area, you didn't tighten the
belt enough. Get out yer big pry stick again and tighten
it up some more. Of course turn off the car before doing
this :)


