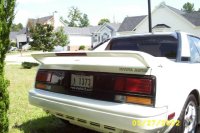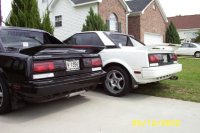
Clear Rear Turn Signals*Courtesy of Bill Merton (bmerton on the MR2 message board) Okay, so you want your ‘2 to look a little different than the average MR2 you see on the street (at least until everybody sees this), so you’re thinking about clear corners for the front. What better way to supplement them than matching the look with your rear tail lights? Here are the typical 87+ tails before the mod.
What you’ll need:
1) Okay, assuming you know how to take the rear inside trunk panel out and remove the light holder assembly, you simply need to remove the nuts holding the light assembly in place. (You will probably find it necessary to remove the air ducting in the ‘87+ to do so.
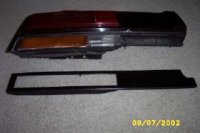
2) Here’s the light removed and ready for disassembly. You’re going to be removing the plastic trim that surrounds the backup and turn signal lights. The screws to remove will be pretty obvious. CAREFUL…when you try to pull the trim loose, you’ll probably find that the center top screw post was glued into place. A little gentle pressure in that area and it will work loose. (The glue doesn’t set hard, but stays a little pliable.)
Here’s the trim you just removed.
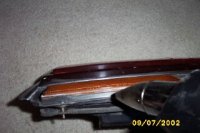
3) Use the heat gun, moving it slowly around the lens to loosen the glue. This will take some time and patience to heat the glue, remove as much as you can, then finally pry up on the yellow lens to remove it. If you break the lens, who cares…but be careful not to screw up the housing too much after you’ve heated it up.
4) After the yellow plate is taken out, you’ll see a clear diffuser in there. It’s held in by a little glue on a tab on either end of the diffuser. You should be able to simply pry it gently free.
5) Remove the backup light lens by heating and prying…You might find it easier to heat this one all the way around, then insert a screwdriver from behind to apply pressure to it.
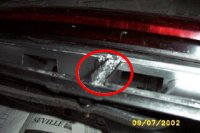
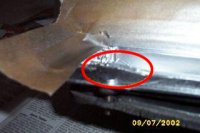
6) Here’s where the bumper chrome paint comes in handy…as you can see, I went ahead and painted mine before I realized I had some prep work to do first. See the “stair steps” circled in red? Cut those down flush with a Dremel cutting wheel so they are straight lines without the stair steps, as indicated by the red lines. These will not only add support for the plastic panel, but they are necessary to minimize bleed-through from one light chamber to the other.
Ahhh…THAT’s more like it.
7) I don’t know if it was absolutely necessary, but I was bothered by the little hump near the outside corners of the housing. They also got cut down with the dremel cutting wheel.
8) Okay…now finish cleaning out as much of the glue as you can (except the stuff that held the plastic diffuser tabs), then give it a good shot of bumper chrome paint. It will look and work MUCH better if you do this.
9) Now, a little prep work on the trim plates…You’ll notice a spot that needs to be cut/ground down inside that plate to give you a level surface around the edge.
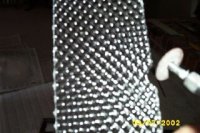
10) Use the straight-edge and sharp utility knife to cut a piece of diffuser panel to 12.5” long and *just* shy of 2.5” wide. Dry fit it into the trim panel You’ll notice a LOT of work needs to be done. Take your time and use the cutting wheel to eat away the panel in the appropriate spots so that if will fit around the screw posts and reinforced areas.
11) When you’re satisfied that you’ve nibbled away all the material for the panel to sit flush, lay a small bead of silicone just inside the edge and insert your panel. Finish by laying more silicone around the edges of the panel after it’s in place. Smooth with your finger and let it set up.
12) Put the diffuser back in (some people don’t), reassemble your light, install, and enjoy! Of course, you’ll need to get the appropriate yellow bulbs to put in your turn signals. The part number is 1156 for the rears (single element for turn signal only) and 1157 for the fronts (dual element for parking lights and turn signals). And voila! Here’s the final product! |
|
| Home • Links •
Email Disclaimer: This web page in no way replaces
the MR2 repair manual. Follow what it says before me. The purpose of
this page is to give you a better pictorial description of what to do.
I cannot be held responsible for any mishaps caused by this web page.
|
